We can update default background properties such as background text and background color/images as below:
Let us create a table with some data and try to apply border properties.
We can set border properties to any elements apart from table such as anchor. Example -
a{
border-style:solid;
border-top-color:blue;
border-left-color: white;
border-right-color: white;
border-bottom-color: blue;
color:hotpink;
border-radius: 10px;
background-color: yellow;
font-size: 30px;
border-width:10px;
}
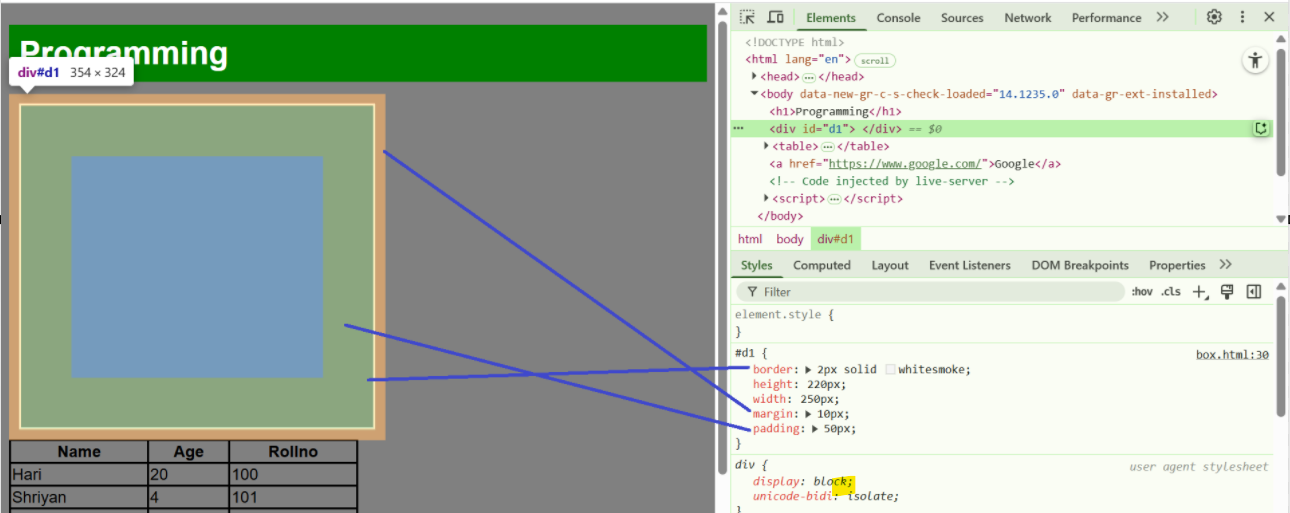
Some more properties. We can create a div which is also a blocked design element and set properties around is as below.
HTML
<div id="d1">
Lorem ipsum dolor sit amet consectetur
adipisicing elit. Porro id perferendis,
eius a officiis magnam velit ducimus corporis
debitis laboriosam praesentium tempora, dolorum
consequatur maxime sit consequuntur nesciunt,
ab fugit voluptatem corrupti tenetur?
Quam, sunt vel provident sapiente a labore.
Natus inventore commodi voluptatum.
Et vel illo excepturi repellat, ullam impedit
exercitationem consequuntur praesentium doloribus
asperiores officia cum rerum obcaecati quibusdam
numquam ex laboriosam aperiam sapiente?
Quam nostrum ullam neque rem incidunt nihil
tempore beatae. Culpa adipisci eaque sint officia
placeat, aspernatur consectetur nobis doloribus
optio recusandae amet est nulla suscipit
laboriosam dolore. Et repudiandae suscipit
perferendis numquam ea. Similique!
</div>
Style element
#d1{
border:2px solid whitesmoke;
height: 220px;
width: 250px;
margin: 10px;
padding:50px;
color:white;
overflow: auto;
}
This sets the properties as below.
border - solid with White smoke colour
height of the border frame as 220px,
width as 250px,
margin as 10px
with padding 50px
overflow - attribute create a frame which is scrollable by default is invisible, auto - means frame will
occupy space intended; if content is larger than it will be converted into scrollable window.
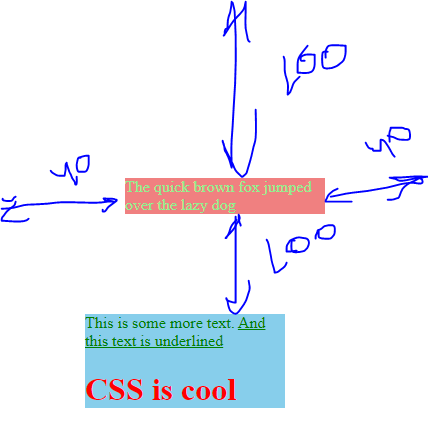
Margin
Some html elements such as heading has defined structure with text space as well as block reserved by default. The distance between the text area and larger block is called margin.
The highlighted space in blue is text area and that highlighted in cream is margin.
Margin helps to setup uniform structure by adding the adequate space to the elements. Its similar to positioning but adds the margin throughout.
Adding margin for first element of 100px -
#first-section {
color:lightgreen;
background-color:lightcoral;
width:200px;
margin: 100px;
}
This adds uniform margin as
The default margin can be modified as
#first-section {
color:lightgreen;
background-color:lightcoral;
width:200px;
margin:100px 40px ; /*top bottom left right*/
}
Same can be written as
margin:100px 40px 100px 40px ; /*top right bottom left - in clockwise manner*/
Same can be written as
#first-section {
color:lightgreen;
background-color:lightcoral;
width:200px;
margin-top:100px;
margin-right:40px;
margin-bottom:100px;
margin-left:100px;
}
Box Model
CSS is based on the box model,
i) If we want to create a gap between border and content is called padding. By default, the gap is 0px in between content and border for most of the elements
ii) If we want to create a gap between border and content, this can be done using padding attribute
iii) Margin is region outside the border
Padding
Padding is similar to the margin but instead of adding the margin to the element, it adds extra padding to the content. This can be very helpful if we want to align our text to box.
#first-section {
color:lightgreen;
background-color:lightcoral;
width:200px;
padding: 5px 10 15 20;
box-sizing: border-box;
}
We can reset default padding in website as
body {
padding:0;
margin:0
}
Combinators
Combinators are ways to access sub-elements within an element. The sub-element can be a descendent / child or ancestor.
Example -
Descendent selector -
Here we are selecting descendent element of d2.
#d2 img{
width: 280px;
height: 240px;
opacity: 0.4;
}
HTML Element
<div id="d2">
<img src="Image.png" alt="">
</div>
To select immediate descendent, we have to use > sign in between elements.
Here img element is inside different division so it is not immediate child of d2. So, the properties of d2 will not be applied in this case. Whereas in above case it just checks the descendent not immediate one, so the changes are applied.
#d2 > img{
width: 280px;
height: 240px;
opacity: 0.4;
}
HTML
<div id="d2">
<div>
<img src="Image.png" alt="">
</div>
</div>
If we want to set immediate adjacent descendent to some properties, then a + sign is required between the attributes.
Example - Let us say, there is one more element p in between d1 and d2 id's; then d1 + p will mean adjacent element of d1 which is p. So, only p1 paragraph will be attributed by given properties.
<h1>Programming</h1>
<div id="d1">
<p>Lorem k ipsum dolor sit amet consectetur adipisicing elit.
Porro id perferendis, eius a officiis magnam velit ducimus corporis debitis
laboriosam praesentium tempora, dolorum consequatur maxime sit consequuntur
nesciunt, ab fugit voluptatem corrupti tenetur? Quam, sunt vel provident
sapiente a labore. Natus inventore commodi voluptatum. Et vel illo
excepturi repellat, ullam impedit exercitationem consequuntur praesentium
doloribus asperiores officia cum rerum obcaecati quibusdam numquam ex
laboriosam aperiam sapiente? Quam nostrum ullam neque rem incidunt nihil
tempore beatae. Culpa adipisci eaque sint officia placeat, </p>
</div>
<p>Lorem ipsum dolor sit amet consectetur adipisicing elit. Corrupti, eligendi.</p>
<div id="d2">
<div>
<img src="Image.png" alt="">
</div>
</div>
If we want to just select the sibling of an element then this can be done using ~ sign in between. Here, it would look for just sibling not specific descendent and apply required properties.
#d1 ~ p{
color: red;
}
HTML
<div id="d1">
<p>Lorem k ipsum dolor sit amet consectetur adipisicing elit.
Porro id perferendis, eius a officiis magnam velit ducimus corporis debitis
laboriosam praesentium tempora, dolorum consequatur maxime sit consequuntur
nesciunt, ab fugit voluptatem corrupti tenetur? Quam, sunt vel provident
sapiente a labore. Natus inventore commodi voluptatum. Et vel illo
excepturi repellat, ullam impedit exercitationem consequuntur praesentium
doloribus asperiores officia cum rerum obcaecati quibusdam numquam ex
laboriosam aperiam sapiente? Quam nostrum ullam neque rem incidunt nihil
tempore beatae. Culpa adipisci eaque sint officia placeat, </p>
</div>
<div id="d2">
<div>
<img src="Image.png" alt="">
</div>
</div>
<p>Lorem ipsum dolor sit amet consectetur adipisicing elit. Corrupti, eligendi.</p>
Pseudo class:
Pseudo class are special attributes which performs some event operation on click and hover over html elements
Example -
hover and focus properties can be set to highlight elements upon click or hover as below.


Comments
Post a Comment